My friend (and occasional writer for The Verge) JR Raphael has a newsletter in which he recently wrote about cleaning up your Google Contacts list by deleting old and no-longer-wanted entries.
What a good idea, I thought. But.
Unfortunately, I am something of a hoarder when it comes to contacts. After years as a tech journalist, I have who-knows-how-many business contact listings, many of which are completely out of date. But although it’s likely that a lot of these people have moved to different companies and different email addresses, I feel I should keep the entries — what if I come across them at some point and want to check where I knew them from? Or what if they still work there even though it’s been several years and I want to say hi?
There is another reason that I am reluctant to delete certain contacts — an unfortunate one. As the years go by, my contact list has begun to include friends and relatives who are no longer with us — and I find that I am loath to remove those names from my list. It’s not logical, or reasonable, but to me it feels like a sort of rejection. In 2015, in an article titled “My Digital Cemetery,” New York Times writer Rob Walker expressed it this way: “The convenient-by-design act of deleting the name of a dead friend with a simple tap or click can feel like overtly participating in removing that person from the world.”
The result of all this is a Google contacts list that has several hundred names in it, many of which belong to people I haven’t contacted in a long time, or whose entries I simply don’t want to delete. What to do?
I’ve found a couple of ways to bring some order to Google Contacts without permanently losing the names, numbers, and other information from people. Here they are:
Hide your excess contacts
Google has a weird way of getting names off your main contact list: you “hide” them. I put “hide” in quotes because what you are essentially doing is moving that entry from your main contacts list to an “Other contacts” list.
“Other contacts” contains entries from all the various people to whom you’ve sent emails or from whom you’ve received them. For that reason, it can be a huge list — but since it isn’t usually in view, if you move your older contacts there, they won’t clutter up your main contacts list.
You can find your “Other contacts” on the desktop version of Google Contacts at the bottom of the left-hand list of labels. (On the mobile version of Contacts, you can’t see your “Other contacts” list, but if you search for a specific contact who is in that list, they will come up in that search.)
Here’s how to move one or more contacts to the “Other contacts” list using the Google Contacts web app:
Hide a single contact
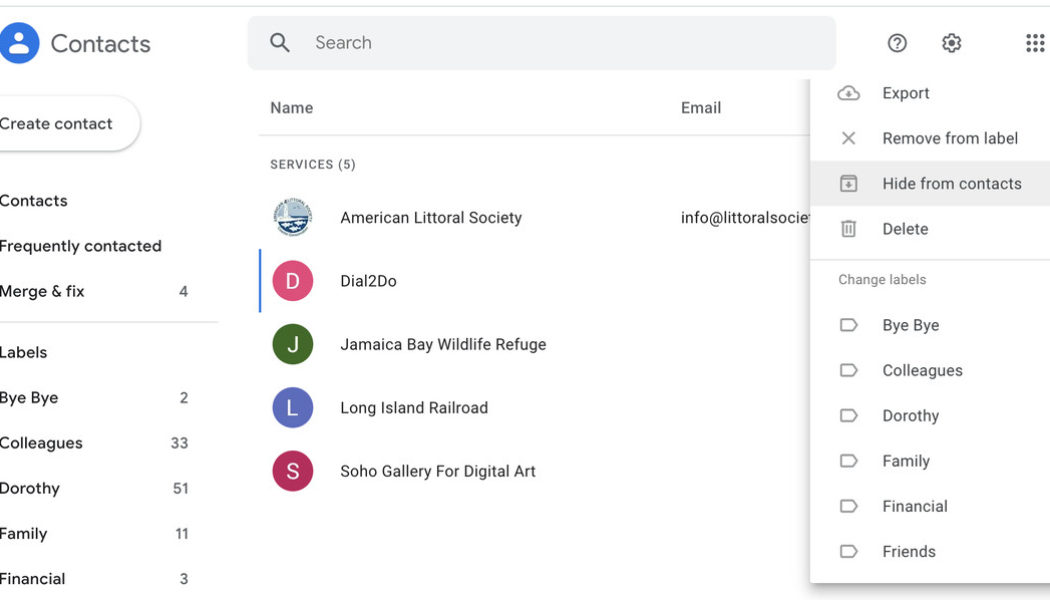
- Cursor over the contact listing so that it’s highlighted, then click on the three dots to the right of the entry.
- Select “Hide from contacts.”
:no_upscale()/cdn.vox-cdn.com/uploads/chorus_asset/file/22803255/Screen_Shot_2021_08_24_at_3.29.25_PM.png)
Hide several contacts
- Click the icon for each contact you want to hide; the icon will turn into a checkbox.
- When you’ve selected all the contacts you want to hide, click on the three dots at the top of the page.
- Click on “Hide from contacts.”
:no_upscale()/cdn.vox-cdn.com/uploads/chorus_asset/file/22803257/Screen_Shot_2021_08_24_at_3.29.58_PM.png)
Incidentally, if your “Other contacts” list is in itself too unwieldy, you can stop Gmail from adding names to it every time you send or receive an email.
- Go to “Settings” > “See all settings.”
- In the “General” tab, scroll down to “Create contacts for auto-complete:” and check “I’ll add contacts myself.”
Export and delete your excess contacts
If you want to really clean up your contacts list, but don’t want to lose the info for those contacts, you can export them into a separate CSV or vCard file. Once they’re safely stored, you can delete them from your Google contacts list.
If you’re like me, you probably have more excess contacts than you want to deal with in one sitting. So here’s the way I found to handle it. (Again, this is using the web interface for Google Contacts).
- In the left-hand column, scroll down to and click on “Create label.” Choose a suitable name (I named mine “Bye bye”).
:no_upscale()/cdn.vox-cdn.com/uploads/chorus_asset/file/22803220/Screen_Shot_2021_08_23_at_4.00.05_PM.png)
- Spend as much time as you need going through your contacts list. Add that label to any entry that you want to move out of the list. The fastest way is to check off any entries you want to label, click on the label symbol above, select the label you created for this purpose from the pop-up, and then click on “Apply.”
:no_upscale()/cdn.vox-cdn.com/uploads/chorus_asset/file/22803227/Screen_Shot_2021_08_23_at_4.17.24_PM.png)
- When you’re ready to export everything you’ve put under that label, click on the label on the left side of the app.
- Scroll down the same left-hand column and click on “Export.”
:no_upscale()/cdn.vox-cdn.com/uploads/chorus_asset/file/22803229/Screen_Shot_2021_08_23_at_4.23.14_PM.png)
- The label that you chose should be at the top of the pop-up window. If it isn’t, you can click on the small arrow to the right of the label and select the correct one.
- You can export your contacts as CSV files formatted for either Google or Microsoft Outlook, or as iCards (if you are importing to iOS).
- Once you’ve got CSV or iCards files, import them into a spreadsheet or other app where you can have access to them if you need to. For example, I imported mine into a Google Sheets file.
- Once you’re happy with your export, go back to Google Contacts and click on the label you created for your exports.
- Click on the delete button.
:no_upscale()/cdn.vox-cdn.com/uploads/chorus_asset/file/22803233/Screen_Shot_2021_08_24_at_11.51.17_AM.png)
- You have a choice to delete just the label (in which case, all those entries will still be there) or delete both the label and all entries that have the label. Select the latter.
Now you have cleaned up (at least somewhat) your contacts list — and all the contacts that you still wanted to hold onto are safe and secure in another file where you can find them if you ever need them.


