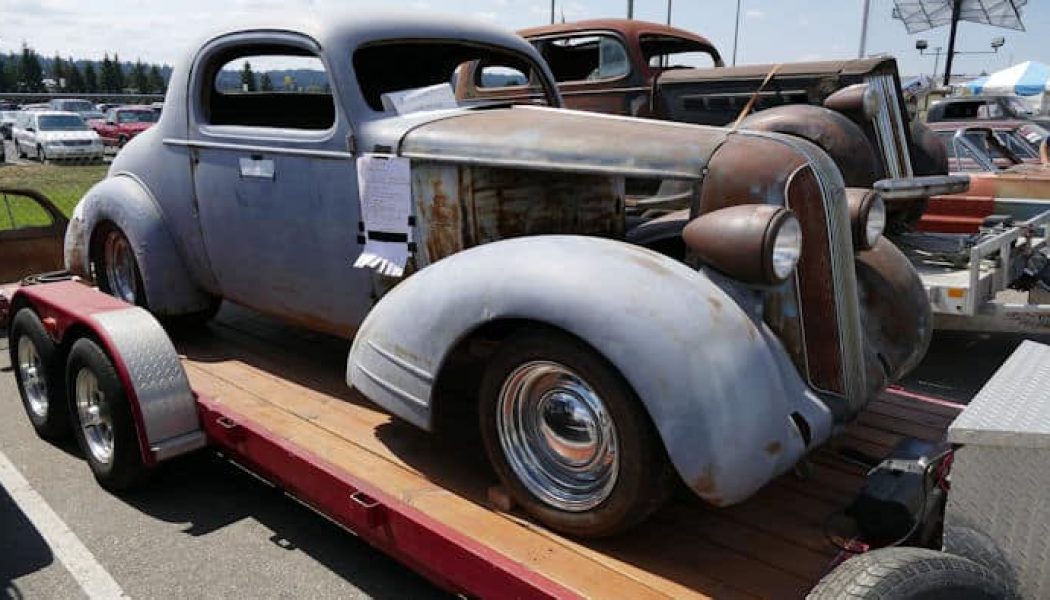
It’s done. You’ve pulled the trigger on that project car and dragged it home. Project cars come in all shapes and sizes, so let’s assume you’ve found yourself one that runs, but just barely. Only your true die-hard hot-rod buddies get it. Everybody else thinks you’re crazy. You see what the non-believers can’t, not a rusty junkyard escapee but a soon-to-be cruiser that just needs a little tweaking to become a loyal daily driver.
Building it is a moral imperative. There are a hundred things that it needs and a thousand cool parts you want, but you can’t afford them all—heck, you can’t afford any of ’em. You just laid down most of your cash for the right to put your name on the title. But you can still plan. And that’s what we designed for you: a plan. It will change, you can almost bet on it, but we put together a basic road map to get you pointed in the right direction.
It’s an annoying fact of life: Building a hot car is not as much about what you want as it is about what you can afford. All the TV shows and much of the magazine hype is all about the latest trick parts and making 1,000 hp. We’re not sure how those folks can afford all that—most car guys we know are scraping by with limited cash because annoying things such as rent and food seem to take precedent over buying new car parts. We think you can pay your rent and still get your garbage running right(ish), so we’re gonna start right at $50 and work our way up through four-digit budgets to offer our recommendations of how to spend your dough.
Because there’s so much to do with a car, we will limit this discussion to engine recommendations. Similar outlines could easily be done for handling, braking, and gearing, and we’ve heard some people like to make their rides look nice, too. For now, we’ll stick to horsepower and torque. What should you do with your next paycheck when it comes to souping it up? By design, this outline will be a bit generic and sort of Chevy/Ford-biased because those are the projects we’re getting the most questions about. All the theory will apply just as well even if your project is a VW or an AMC—only the budget will go twice as far for the former and need to be tripled for the latter. Sorry. Let’s get started!
Budget: $50
If you’re starting with $50, by the time you change the oil and fill the tank on your new baby, you’ll be in the negative, but let’s imagine you’ve still got five Hamiltons in your wallet. Consider spending those fellas on an assembly manual or book for your car just so you can see how all the pieces fall together.
Something people rarely mention when dealing with old cars is that the electrical systems generally suck, so a color wiring schematic of your car is a great place to start. You will need to trace down wiring problems sooner or later, especially if the harness has been hacked by people taught by rodents to gnaw on wiring for a living. We found 11-by-17-inch color diagrams from ClassicCarWiring.com for numerous popular applications for only $17.95.
Another move that can really benefit the electrical side and costs nearly nothing is upgrading the charging system with a larger wire. It’s not uncommon to find a major voltage drop between the alternator and the battery. The test is simple enough. With the engine running and with an electrical load (headlights on bright, for example), check the voltage at the alternator output and then at the battery. If the meter reads 14.5 volts at the alternator and only 13.5 volts at the battery, that’s a problem. This voltage drop should be no more than 0.40 to 0.50 volt. Clean all the connections, and if an excessive drop continues, increase the size of the charge wire from the alternator to the battery. A fully functioning charging system is important, and at the very least your headlights will be brighter. So maybe that’s something else for your first spend, a multimeter. A cheapie will set you back $20.
You’ve got about $12 left from your $50, so give your cooling system a quick glance. Does your radiator cap maintain pressure? Is the thermostat opening when it should? Are the hoses squishy or leaking? You can’t fix all three with $12, but you can tackle one of them.
Budget: $100
Spend some time power washing, degreasing, and detailing the engine compartment. If you’re really motivated, buy some semigloss spray paint, mask off the fenders and engine, and paint the engine compartment. This won’t make the engine run any better, but it will look nice in your Instagram photos.
We’ll assume you have some basic hand tools, but you might have to borrow a timing light and a compression tester for this next part. Remove all the spark plugs and perform a compression check. You can look up your specific engine’s cranking compression if you like, but if your engine has lots of miles on it, your results will likely be cause for disappointment. Generally, a ’70-’80s production V-8 will generate cranking compression of about 140 to 170 psi depending upon a raft of variables. Newer engines should be a little higher, older engines might be lower, but what we are seeking is not necessarily a high reading as much as consistency between cylinders.
Do the check with all the spark plugs removed, the ignition system disabled, the engine warm, and the throttle blades popped open. A 10 percent variation is normal. Assuming the readings are good, you can move on to replacing the spark plugs with stock heat-range, extended-nose spark plugs along with the distributor cap and rotor. All of these parts are building blocks for later upgrades.
Next, check the plug wires for resistance. This is a decent test for wire condition—look for readings of less than 10,000 ohms of resistance. A lower number is better. Don’t stress if the resistance is around 2,000 to even perhaps 3,000 ohms for the entire length of the plug. Lower resistance is better, but avoid wires with 30,000 ohms or more. The better plug wires are the spiral-wrapped wires from Accel, FAST, Moroso, MSD, Taylor, and others. We prefer the universal sets that allow custom wire routing to give the engine a cleaner appearance. Make sure to allow sufficient wire length around the distributor cap to allow moving the distributor to adjust timing and to get the cap on and off without difficulty. This sounds simple, but more than once we’ve been tripped up by beautiful wire routing that prevented free distributor movement to set the ignition timing.
With the new parts in place, you can set the timing. Start by cleaning and marking the harmonic balancer and disconnecting the vacuum advance canister. With the timing light hooked to No. 1 plug wire, check for initial timing at idle of around 8 to 12 degrees before top dead center (BTDC). This is called initial timing. Checking total timing will require either a timing tape to indicate total timing or a dial-back timing light. The total to shoot for is around 36 degrees as a good starting point. The dial-back timing light is easiest to use, and a few affordable lights work well. The idea is to rev the engine to around 3,000 rpm and set the TDC mark on the balancer to 0 degrees by moving the dial on the light. The dial will indicate the total amount of timing. This is the same procedure if you are using a digital dial-back light. Remember to do this with the vacuum advance hose disconnected. Otherwise your numbers will be off by the amount of advance added by the vacuum canister. If you don’t have a dial-back light, you can use a standard timing light and install a simple timing tape. MSD sells inexpensive timing tapes for each harmonic balancer diameter. This is available as PN 8985 for a mere $4.12 through any big online parts house.
Setting timing is an important step. Ask the RK guys how they know.
Budget: $200
Now it’s time to look at the induction side of the engine. We’ll include ideas for both carburetors and EFI. With older cars, it’s often enticing to make immediate wholesale changes—such as ripping off that older TBI system or stock carb and replacing it with a new $500 one. If the EFI system is going to demand thousands of dollars to repair, then maybe that’s a good idea. But for the majority of cases, it will be cheaper to rebuild what you have. Often, performance will improve just by returning everything back to factory fresh.
Let’s take the case of a late ’70s or early ’80s carbureted GM application such as an ’82 Camaro with a Quadrajet. Perhaps all that feedback Q-jet needs is just a rebuild kit. We researched using RockAuto.com, and a basic gasket kit from Standard Motor Products is less than $30. A 34-year-old Q-jet might need extra help from a new float and perhaps rebuilding the primary throttle shafts with new bushings. That will certainly cost extra, but you still won’t be into it for more than perhaps $200. Most drivability issues can be traced to vacuum leaks, so make sure all those miles of vacuum hoses are in good shape. This isn’t just a GM thing. Dodge, Ford, Datsun, and anything carbureted are likely to have some gummed-up passages or leaky floats if theyve been sitting around. Rebuild kits are cheaper than new carbs.
On the injected side, let’s say you have an ’89 Mustang 5.0 with EFI, and it runs a little soggy. The issue might be just as simple as dirty or clogged fuel injectors. Sometimes just a shot of mechanic-in-a-can cleaner will help, but most often the best route is to remove the injectors and send them off to be professionally cleaned and flowed. There’s a company called ASNU that has built a slick vibrasonic cleaner and injector flow test machine
that will measure the flow of all eight injectors. Our pals at Westech Performance have one of these ASNU machines and can clean a set of injectors and determine if any have failed or are way under-performing. The cost will vary, but it’s usually less than $200. There are many companies that perform this service. We found a site called WitchHunter Performance that will clean and flow a set of eight injectors for $177.
Depending on the year of your project car, you might have an early fuel injection from the throttle-body EFI days. These systems were fed by throttle bodies that were almost universally short on fuel and airflow. These throttle-body systems use a low-pressure (13-15 psi) system with a pair of injectors mounted in the top of the throttle body. The problem with GM’s TBI was it was limited in both air and fuel flow. For near-stock engines, this system functions, but be aware that planning improvements to make more than perhaps 275 hp will require major TBI mods. The typical 350ci small-block GM throttle body flows less than 500 cfm, and the injectors are limited to 65 lb/hr of fuel flow. So unless you jack up the fuel pressure, these are limited to about 275 hp. Any tune-up should be accompanied by a new fuel filter.
Budget: $500-$750
Now that the car is capable of starting and idling on its own, we can start making changes that will add power. Forum sages will be insulted that we didn’t instantly suggest prolific induction changes, but our experience has taught us that enhancing the exhaust side first will deliver the best results.
Of all the choked-off engines of the past, the emissions-controlled cars from late ’70s to mid-’80s are among the worst. You can see some dramatic improvements with a simple cat-back exhaust system swap. Starting with the exhaust allows for later induction improvements. We’ll use personal experience on a ’93 Chevy TBI 350ci pickup as an example. We replaced the original catalytic converter and exhaust with a new cat and a DynoMax mandrel-bent exhaust system. Rear-wheel power went from 200 to 229 lb-ft of torque and from 140 to 168 hp. Those are honest 20 percent increases. Granted, the numbers aren’t large, but you will feel 20 percent every time you step on the throttle. The 3.0-inch mandrel-bent system with a high-flow muffler gave the exhaust a nice tone but wasn’t overly loud.
For non-emission controlled cars, even upgrading from factory compression-bent 2.0-inch pipes to a mandrel-bent 2.5-inch system represents a drastic flow increase. Compression bending reduces the inside diameter of pipes by a considerable amount. We measured the inside diameter of some 2.0-inch compression-bent exhaust pipe and discovered that compared to a mandrel-bent pipe of the same size that the compression bends reduce pipe’s diameter by 10 percent and the flow area by 17 percent. Now let’s go a step further and increase the pipe diameter from 2.0 inches (1.840-inch i.d.) to a true mandrel-bent 2.5-inch system. This move increases the flow area from 2.3 square inches to a massive 4.3 square inches. That’s an 87 percent increase in flow area and does not take into account the compression bending reducing the area even further. Sure, mandrel-bent systems cost more, but the power improvement justifies the cost. Remember, we’re laying the foundation for a stronger engine.
Here is a comparison of compression bends with the 2.0-inch pipe on top with a mandrel-bent 2.5-inch pipe on the bottom. This upgrade from 2.0-inch to 2.5-inch mandrel is worth nearly a 100 percent increase in flow. Even the OE’s now include mandrel-bent tubing for this same reason.
Companies such as Borla, DynoMax, Flowmaster, and MagnaFlow make systems for specific cars. For example, DynoMax makes a stainless cat-back kit for a 5.0L ’88 Camaro (PN 38512) that we found for $373.97. Another example would be a Borla stainless 2.5-inch cat-back system for a ’90 5.0L Mustang (PN 14445) that’s a little more at $599.95, but it’s well within our budget.
On the non-catalytic convertor front, things are easier. If you’re up for some fabrication effort, Jegs offers header-back kits for most common ’60s muscle cars for about $200. Add in mufflers, and start welding. Or leave mufflers out if you don’t like your neighbors.
Back on the post-smog front, BBK makes a nice ceramic-coated set of shorty headers for a 1989 Mustang 5.0L (PN 15150) for $300, and if we combine that with a Flowmaster cat-back system (PN 17106) for $465, we’ve got nearly a complete new 2.5-inch exhaust system and headers for less than $775. That should be worth at least 20 hp over stock while retaining the emissions legality in states that require testing.
How much are regular long-tube headers worth? We did that exact test on a basic 350ci small-block Chevy crate engine. With iron-log manifolds, the engine made exactly what Chevy said it would: 290 hp and 311 lb-ft of torque. We then added headers, and the power jumped to 320 hp and 348 lb-ft of torque. That’s an improvement of 30 hp and 37 lb-ft of torque. That says it all.
It might be worth the extra coin to pay a professional exhaust shop to install your system only because it often requires fabrication and welding to install properly.
Budget: $1,000
Dang, a grand! Someone’s been saving their pennies. As a reward, let’s go racing. We admit, we’ve been a little conservative so far. Most folks would have already had you swapping intakes and camshafts, but we’ve established a sound engine baseline, a proper tune-up, and an upgraded exhaust system. You deserve some action now, so let’s talk about a better induction system.
And nitrous.
If you’ve already rebuilt the carb, even a stock carb, and it is working properly, it’s smarter to spend your limited dollars on a better intake manifold. It’s all about maximizing what you have and what fits under your hood. Before you buy that tall intake, be sure to measure the hood clearance or plan to cut a hole.
Remember that every new part has some costs above the component itself. Removing an old intake will require new intake and carb gaskets, and depending on if you’re switching around between FI and carb, it might also demand a fuel-pressure regulator. Often, companies such as Jegs or Summit Racing will offer combinations of intake manifolds, carburetor, and gaskets for a group buy price. For example, this Edelbrock package includes the EPS dual-plane intake, an Edelbrock 600 cfm electric choke carburetor, and all the gaskets necessary to bolt up to a small-block Chevy like a 305 or 350 all for about $530.
Enough sensible stuff. Let’s assume we have a reliable 350ci stock engine with a mandrel-bent 2.5-inch dual exhaust system, headers, and a dual-plane intake with a 600 cfm Holley carburetor. The horsepower gods came down from Drag City, handed you $600, and told you that it had to be spent on your car immediately to make it go faster. The answer to that challenge can be found in one word: nitrous.
There are several nitrous companies, but we’re partial to the NOS Cheater system. The base price we saw for this system online is $569.66. There are less expensive kits out there, but the Cheater kit offers the greatest opportunity for making more power with simple jetting changes; the less expensive kits will require buying additional parts to bump the power. It’s worth noting, however, the hidden costs of nitrous.
All kits are delivered with an empty bottle because of safety hazards of shipping pressurized containers. You have to fill that bottle at roughly $5.00 per pound. That 10-pound bottle just added $50. The next thing you will learn is how quickly you can empty that bottle. You might get three good quarter-mile runs out of a full 10-pound bottle.
Nitrous systems also rely on a source of reliable fuel pressure. A basic 100-hp system doesn’t place a great load on a typical fuel delivery system, but as we hit 150 to 200 hp, the tuner will need to ensure fuel pressure is stable. Tapping a line off a stock fuel pump feed line might not be sufficient to feed a 150-hp nitrous system. You’ll need to build a reliable fuel-delivery system to supply fuel and pressure to feed 600 hp.
A 350-hp naturally aspirated small-block engine with a 200-hp nitrous kit is making 550 hp, but if the fuel pressure falls off at the point of highest demand, that’s how melted pistons happen. If you can’t afford a quality fuel-delivery system, then you might want to wait on the cheater gas.
Budget: $2,000 – $2,500
Now we can dive into the engine. Finally! So far, we’ve dealt mainly with bolt-ons and external engine components. To make more power with a naturally aspirated engine, we must improve breathing with cylinder heads and a camshaft. Edelbrock was a very early promoter of the dyno-tested, packaged-power concept with the simple creation of the Performer system way back in the early ’80s. The first effort was, of course, the small-block Chevy, and the company has since greatly expanded the system with multiple engine families. Edelbrock now offers both Performer and Performer RPM combinations that include cylinder heads, camshaft, intake manifold, and a carburetor for most popular engines.
The brilliance behind packaging an intake manifold, heads, a cam, and a few valvetrain parts is that this makes it easier for an entry-level enthusiast to create a fully integrated combination. Of course, Edelbrock is not the only company offering packages. There are dozens for both carbureted and EFI applications. For the EFI 5.0L Ford guy, Trick Flow Specialties (TFS) has created a Twisted Wedge package with a pair of heads, a TFS two-piece intake, a hydraulic roller cam and valvetrain, and all the gaskets. TFS claims this system will make 350 hp from a 306ci short-block twisting 370 lb-ft of torque. That is awesome torque for such a little motor (1.17 lb-ft per cubic inch). The kit is PN TFS-K514-360-350, and at $2,700, it blows right past our $2,000 budget, so if you want it, better work some overtime.
One issue with older EFI engines such as the 5.0L Ford or Chevy TPI is those OE computers use chips that must be “burned” each time there is a minor tune change. FAST offers a chance to employ the new self-learning fuel injection to an older system. This uses the EZ-EFI 1.0 ECU and a wiring harness. It controls only fuel, so a separate ignition system will be required. This kit is less than $900 and makes tuning these early EFI engines easy.
What’s next? We could keep going into the hundreds of thousands, but you can figure this stuff out from here. The theory behind swapping in an LS engine or throwing a turbo on a Mopar 360 is no different from rebuilding the carb or upgrading the wiring. It’s all about getting the basics in place and being prepared for the sneaky costs. If you’re going for big horsepower, you need to build the car around the engine. You’ll need to upgrade axles and third members, cooling systems, driveshaft, fuel delivery, brakes, wheels, and tires. It’s enough to make you panic if you look at it all at once, but just break it down and buy a piece at a time. You’ll get there.