Even before the COVID-19 pandemic closed most offices, more and more official papers were being turned into PDF documents. (PDF stands for Portable Document Format; it is a standard created by Adobe in the early 1990s that allows paper documents to be turned into exact digital copies.) These days, hard copy paperwork is fast becoming the exception rather than the rule. However, even digital documents have to be signed. You can do it the long way — print those documents out, sign them, and then scan them back into your computer — or you can create a digital signature and place it directly on the PDF.
Unfortunately, while Windows doesn’t offer a built-in PDF signing feature the way a Mac does, there are third-party apps you can download that will give you the same ability. In this case, I’m using Adobe Acrobat Reader DC, which is Adobe’s free PDF reader. Here’s how to set it up and use it to sign your PDF documents.
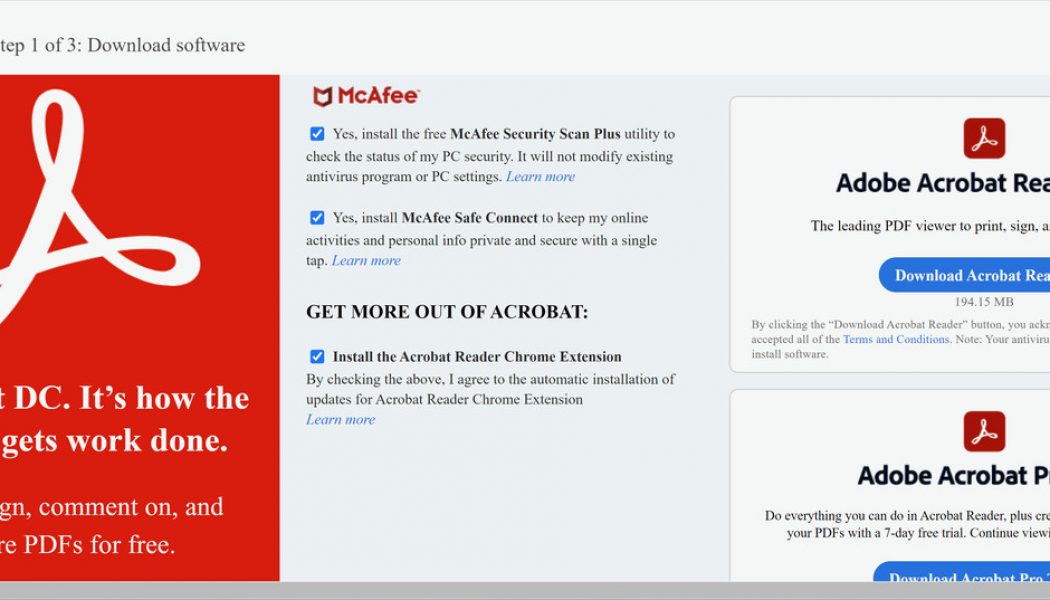
- Download Adobe Acrobat Reader DC. Adobe has the unfortunate tendency to encourage people to download excess apps, so make sure you uncheck all the additional installations that may pop up on the page: in my case, it was two McAfee apps and Acrobat’s Chrome extension. (You can install this last one later if you think it might be useful.)
- After you click on “Download Adobe Reader,” you can start the install by clicking on the downloaded .EXE file.
:no_upscale()/cdn.vox-cdn.com/uploads/chorus_asset/file/22360298/adobe1___Copy.png)
- At the end of the installation, Acrobat Reader DC will ask if you want to make Adobe Acrobat Reader your default PDF application. Up to you.
- Once it’s installed, Acrobat Reader will open. Look for “Fill & Sign” in the main window. Click on that and then click on “Select a File” to choose a PDF file to work on.
:no_upscale()/cdn.vox-cdn.com/uploads/chorus_asset/file/22360300/adobe10.png)
- Alternatively, you can open the file first (by going to “File” > “Open”) and then select the “Fill & Sign” feature from the app’s right-hand column. (If you don’t see any labels under the icons, it’s the one that looks like a pen in the act of writing.)
- A new window will ask “What do you want to do?” Click on the “Fill and sign” button under the left-hand picture.
:no_upscale()/cdn.vox-cdn.com/uploads/chorus_asset/file/22360323/adobe5.png)
- Your document will come up in Acrobat. Click on the “Sign” icon (another pen) in the top line.
- Click on “Add Signature.” (If you already have added a signature, you can use the “Add Initials” choice to save a second signature, if you wish.)
:no_upscale()/cdn.vox-cdn.com/uploads/chorus_asset/file/22360365/adobe6.png)
- A pop-up window will give you three ways to sign your document: type your name (Adobe supplies you with several handwritten-looking fonts), draw your signature (either using your touchpad or directly on a touchscreen), or upload an image of your signature.
- However you create your signature, if you will want to use it in the future, make sure the “Save signature” box is checked. Then click on “Apply.”
:no_upscale()/cdn.vox-cdn.com/uploads/chorus_asset/file/22360374/adobe7.png)
- Once you’ve hit “Apply,” your PDF document will be back. Place your new signature where you want it on the document and left-click. You can then change the size or placement of the signature if you wish.
:no_upscale()/cdn.vox-cdn.com/uploads/chorus_asset/file/22360383/adobe8.png)
And you’re done! Now, if you want to add your signature to a PDF, just open your document using Adobe Acrobat Reader and click on the “Sign” icon. You can then select your saved signature and place it where you need it on your PDF document.
:no_upscale()/cdn.vox-cdn.com/uploads/chorus_asset/file/22360852/adobe12.png)
Adobe Acrobat Reader DC is, of course, not the only app that you can use to read and / or edit a PDF document. There are a variety of other apps out there with free versions that will let you do basic PDF work, such as HelloSign, Smallpdf, and Docsketch. However, most of those free versions come with limitations — for example, both HelloSign and Docsketch let you sign up to three documents a month, while Smallpdf lets you process up to two documents per day. Adobe Reader doesn’t have any limitations on your ability to sign documents, but if you want to create a PDF, or export it to another format, you’ll have to get the Pro version.


