Google Photos just got a shiny, upgraded set of tools. Here’s how to use them.
Google Photos isn’t just a place for storing and sorting your photos and videos — both the web interface and the mobile apps come with a slew of image editing tools so you can spruce up and enhance your pictures before sharing them with the wider world.
Google regularly updates these editing tools, and a significant upgrade just arrived on the web. There are new features here (some of which were previously available only on the Android app), including preset color profiles and more granular control over existing features such as brightness and contrast adjustment.
All you need to do to try them out is open your browser and navigate to Google Photos. Open an image, click the edit button in the top-right corner (it looks like a series of sliders), and you’ll be in the editing interface, which will appear as a sidebar on the right side of the screen.
There are four (five, if you are a Google One subscriber) different editing panels to work through, and we’re going to tell you what each one is about. (And yes, some of the editing options are exclusive to Google One subscribers; those options will be marked on your screen by a 1 in a circle.)
First tab: Suggestions

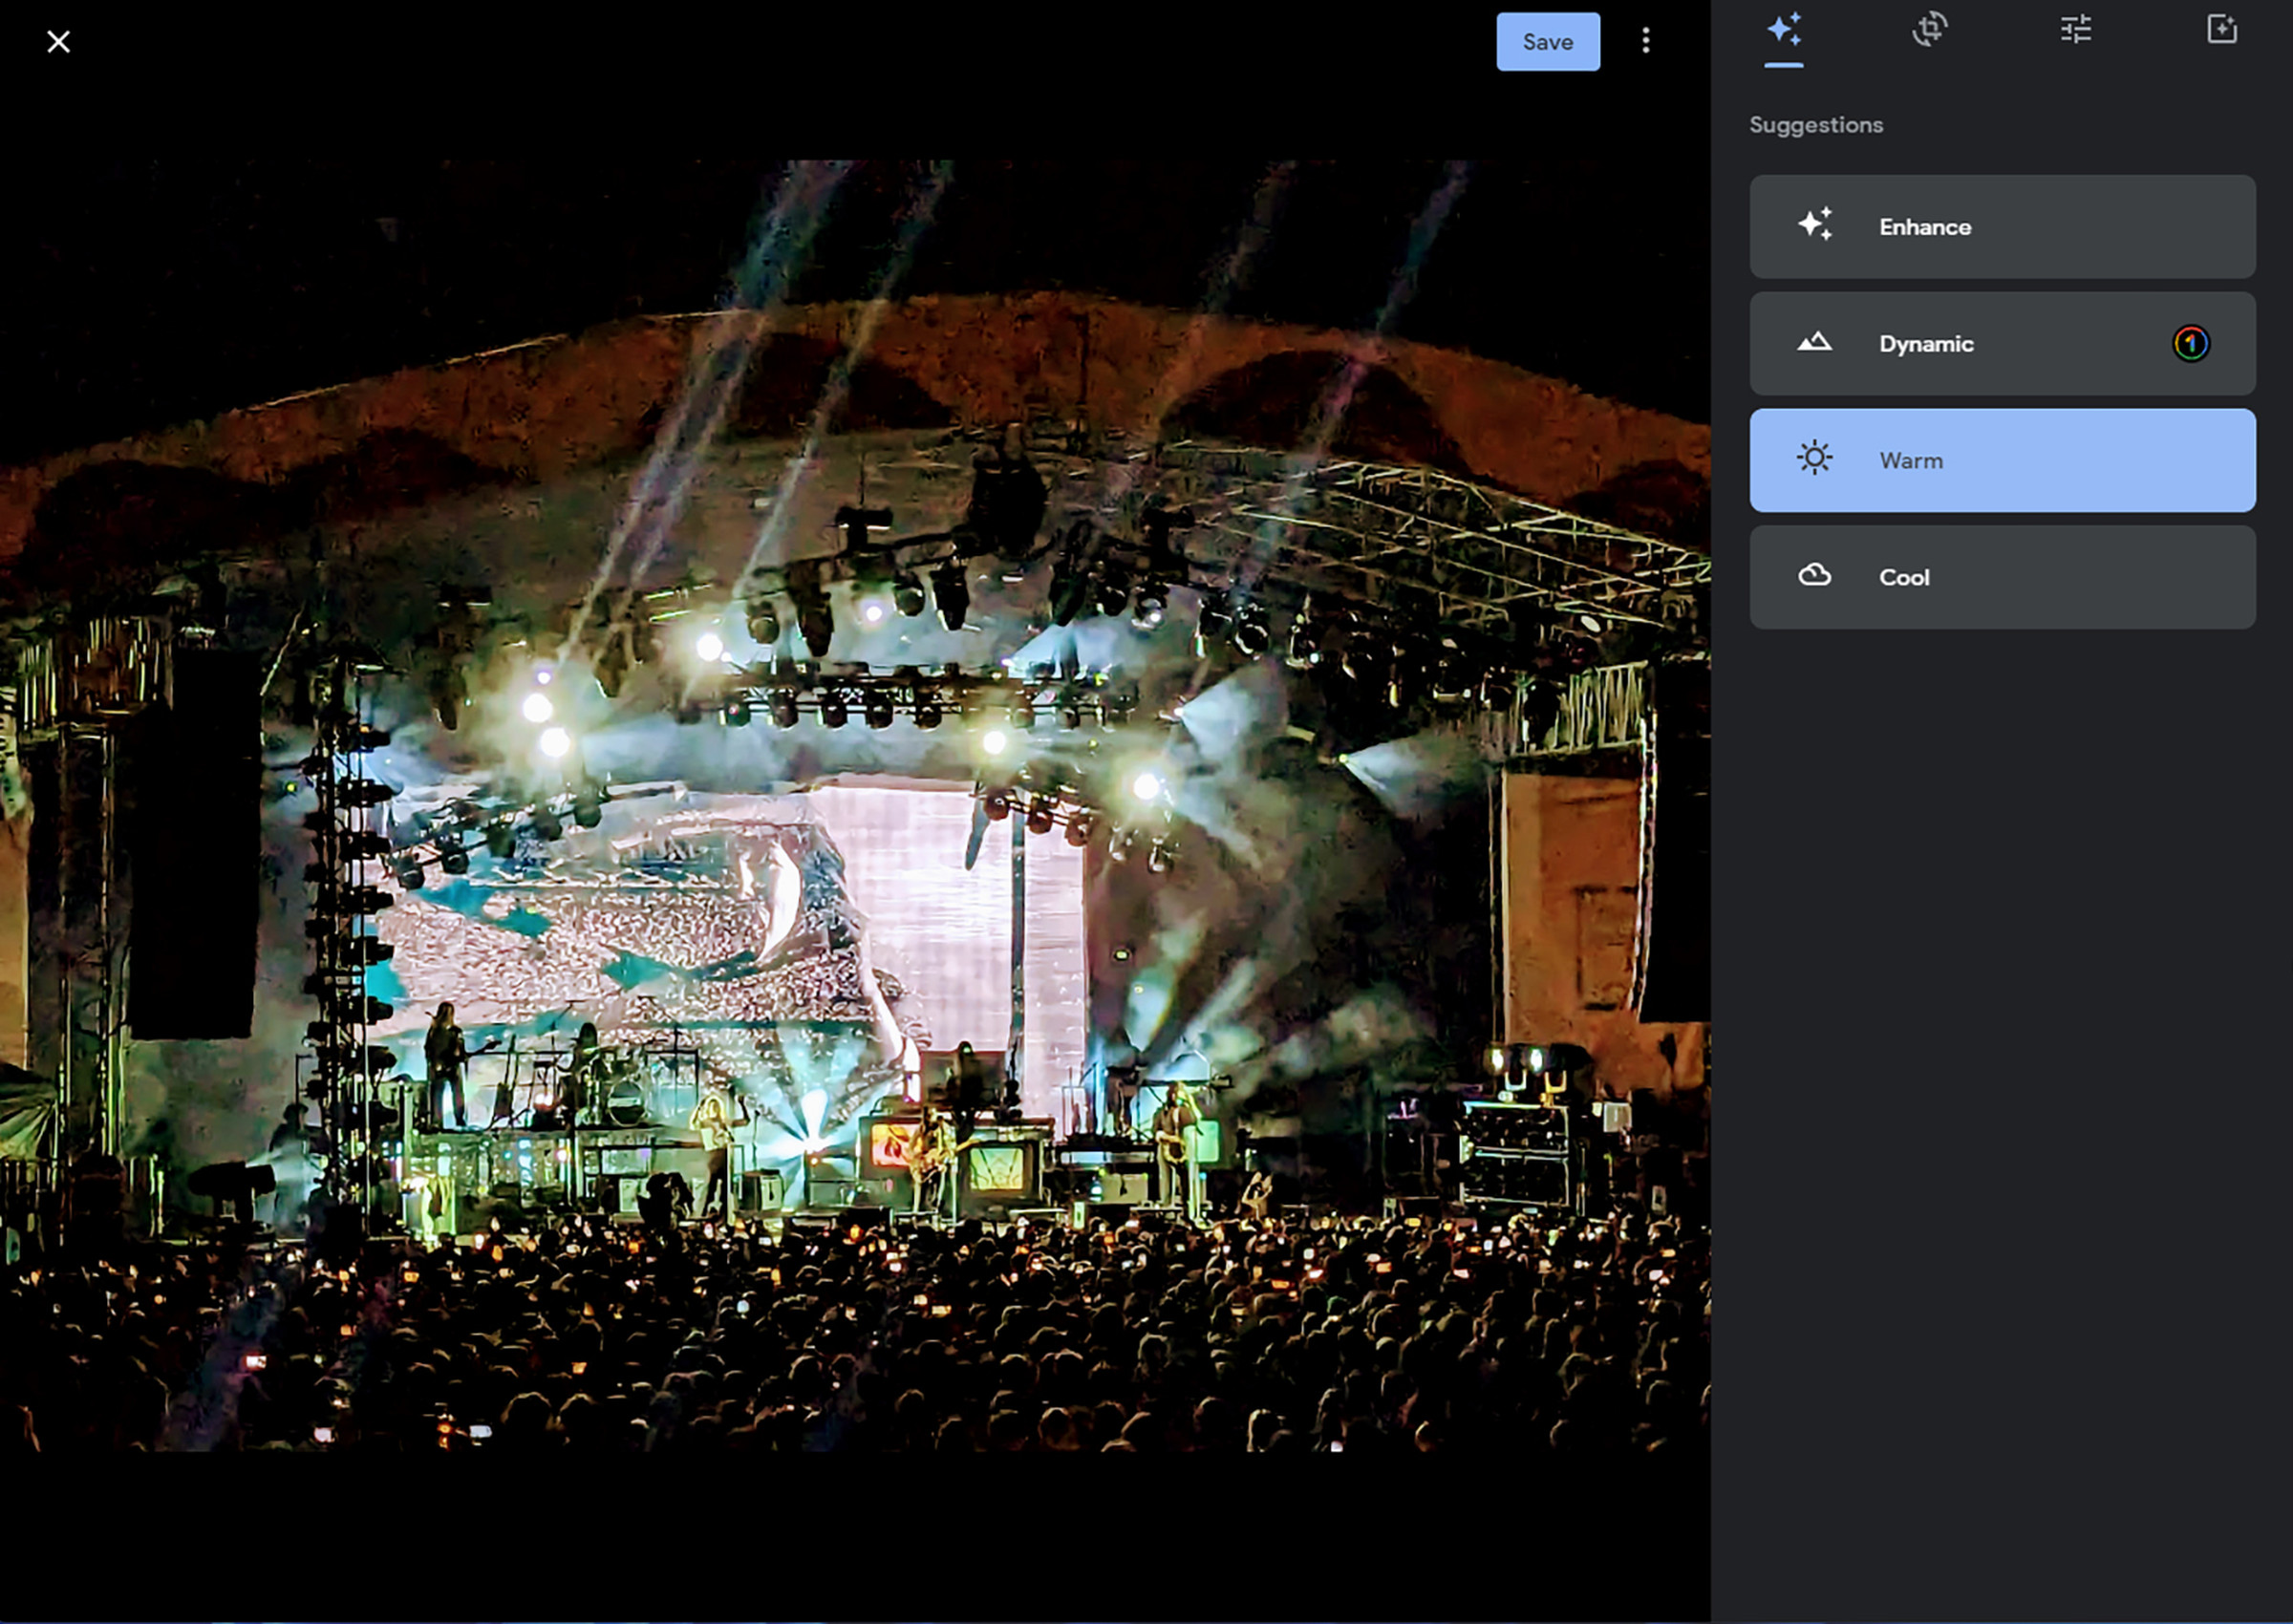
Suggestions (the star icon) is a new feature similar to that which has been part of the Android Photos app. It lists tweaks that Google Photos thinks will improve your image. Different suggestions will appear for different images depending on their content. For example, Enhance applies a range of optimizations, while Warm and Cool adjust the overall temperature of a picture.
If you’re a Google One subscriber, your selection of choices will be wider. Some of those features include Blur, which blurs the background; Color pop, which highlights foreground colors; and Dynamic, which applies HDR processing to bring out details in darker and lighter areas.
You just click on any of these suggested options to see how they change the look of the image and click again to remove the processing and go back to the original look. It’s a useful way of letting Google’s analysis algorithms make the decision about how to get your photos looking their best.
Second tab: Crop

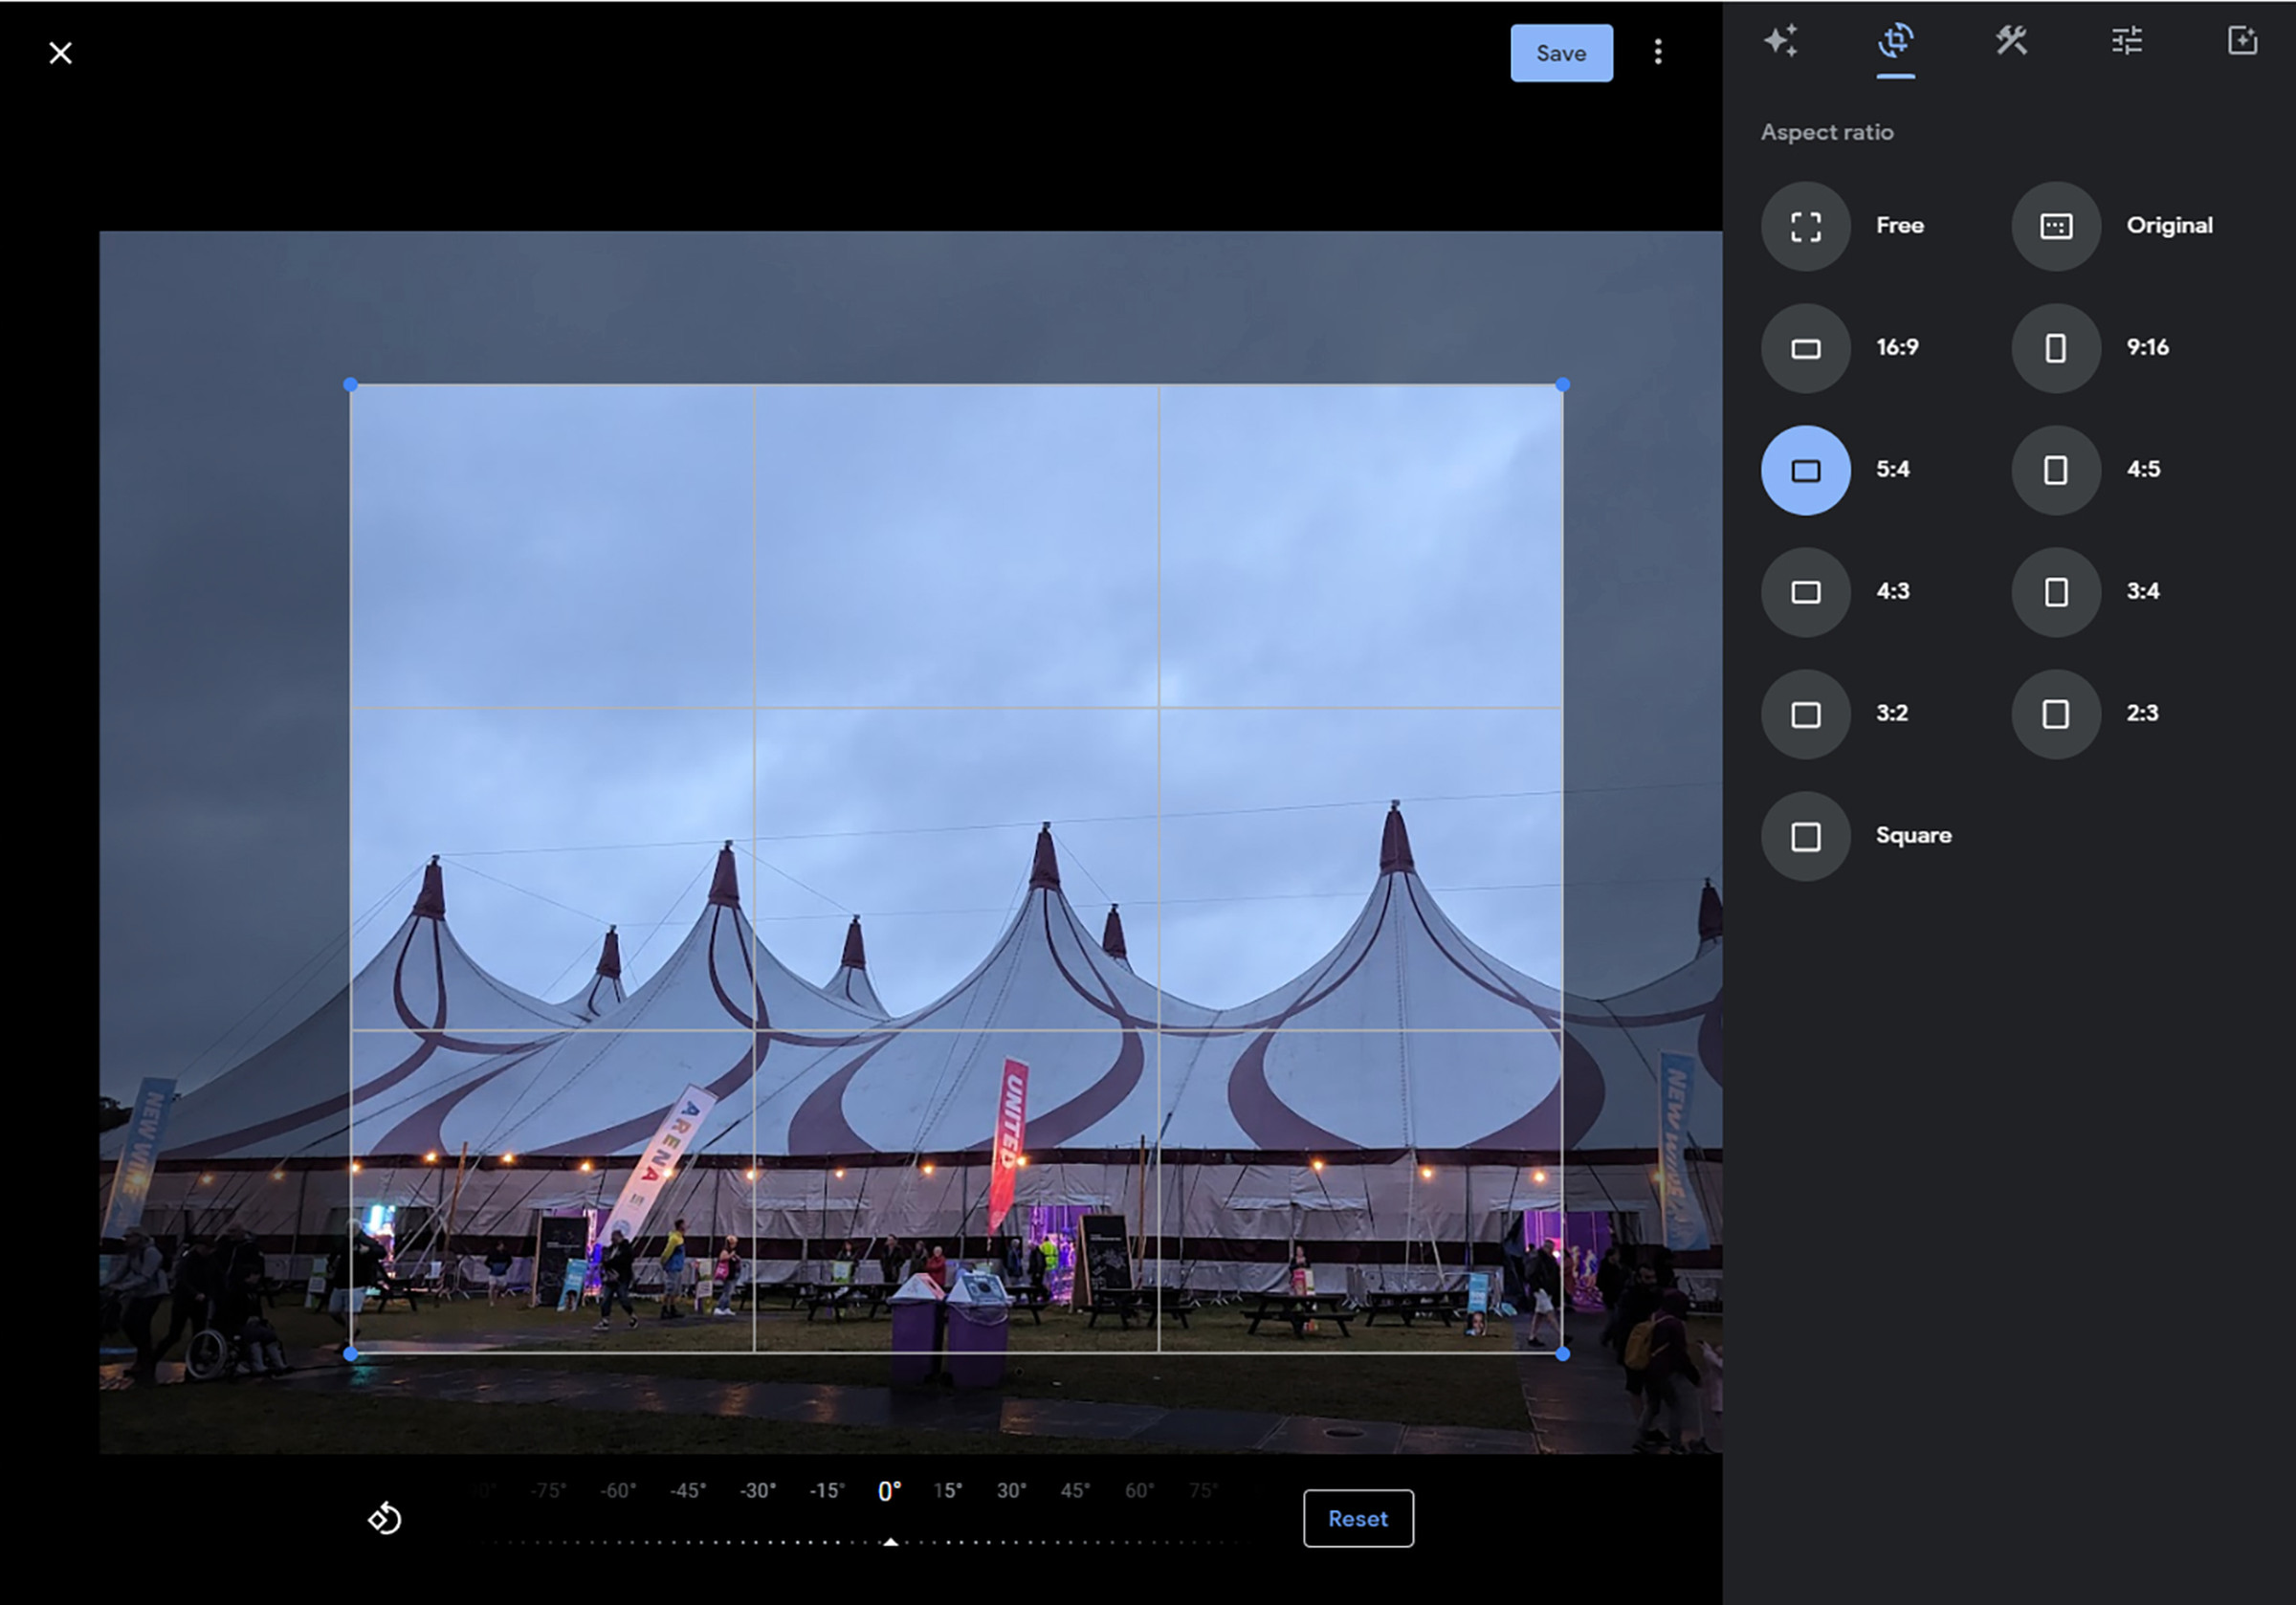
The Crop tab (the corner markers and arrows icon) is where you can crop an image and rotate it. Crop was previously available in the editing interface, but what’s new are preset aspect ratios you can pick from — which means you can get to the image shape and size you need more quickly.
- Select any of the aspect ratios. If it’s not quite right, then use the handles at the corners of the selection to adjust it.
- Click and drag inside the crop selection window (the cursor changes to a hand icon) to alter which part of the image the crop focuses on.
- Click and drag along the bar underneath the image, marked with a series of angles, to change the rotation of the image.
- Click the rotate button to the left of the bar to rotate the image by 90 degrees in an anti-clockwise direction.
- Click Reset to undo all of the changes that you’ve made on this tab and go back to the original framing and rotation.
Third tab: Tools

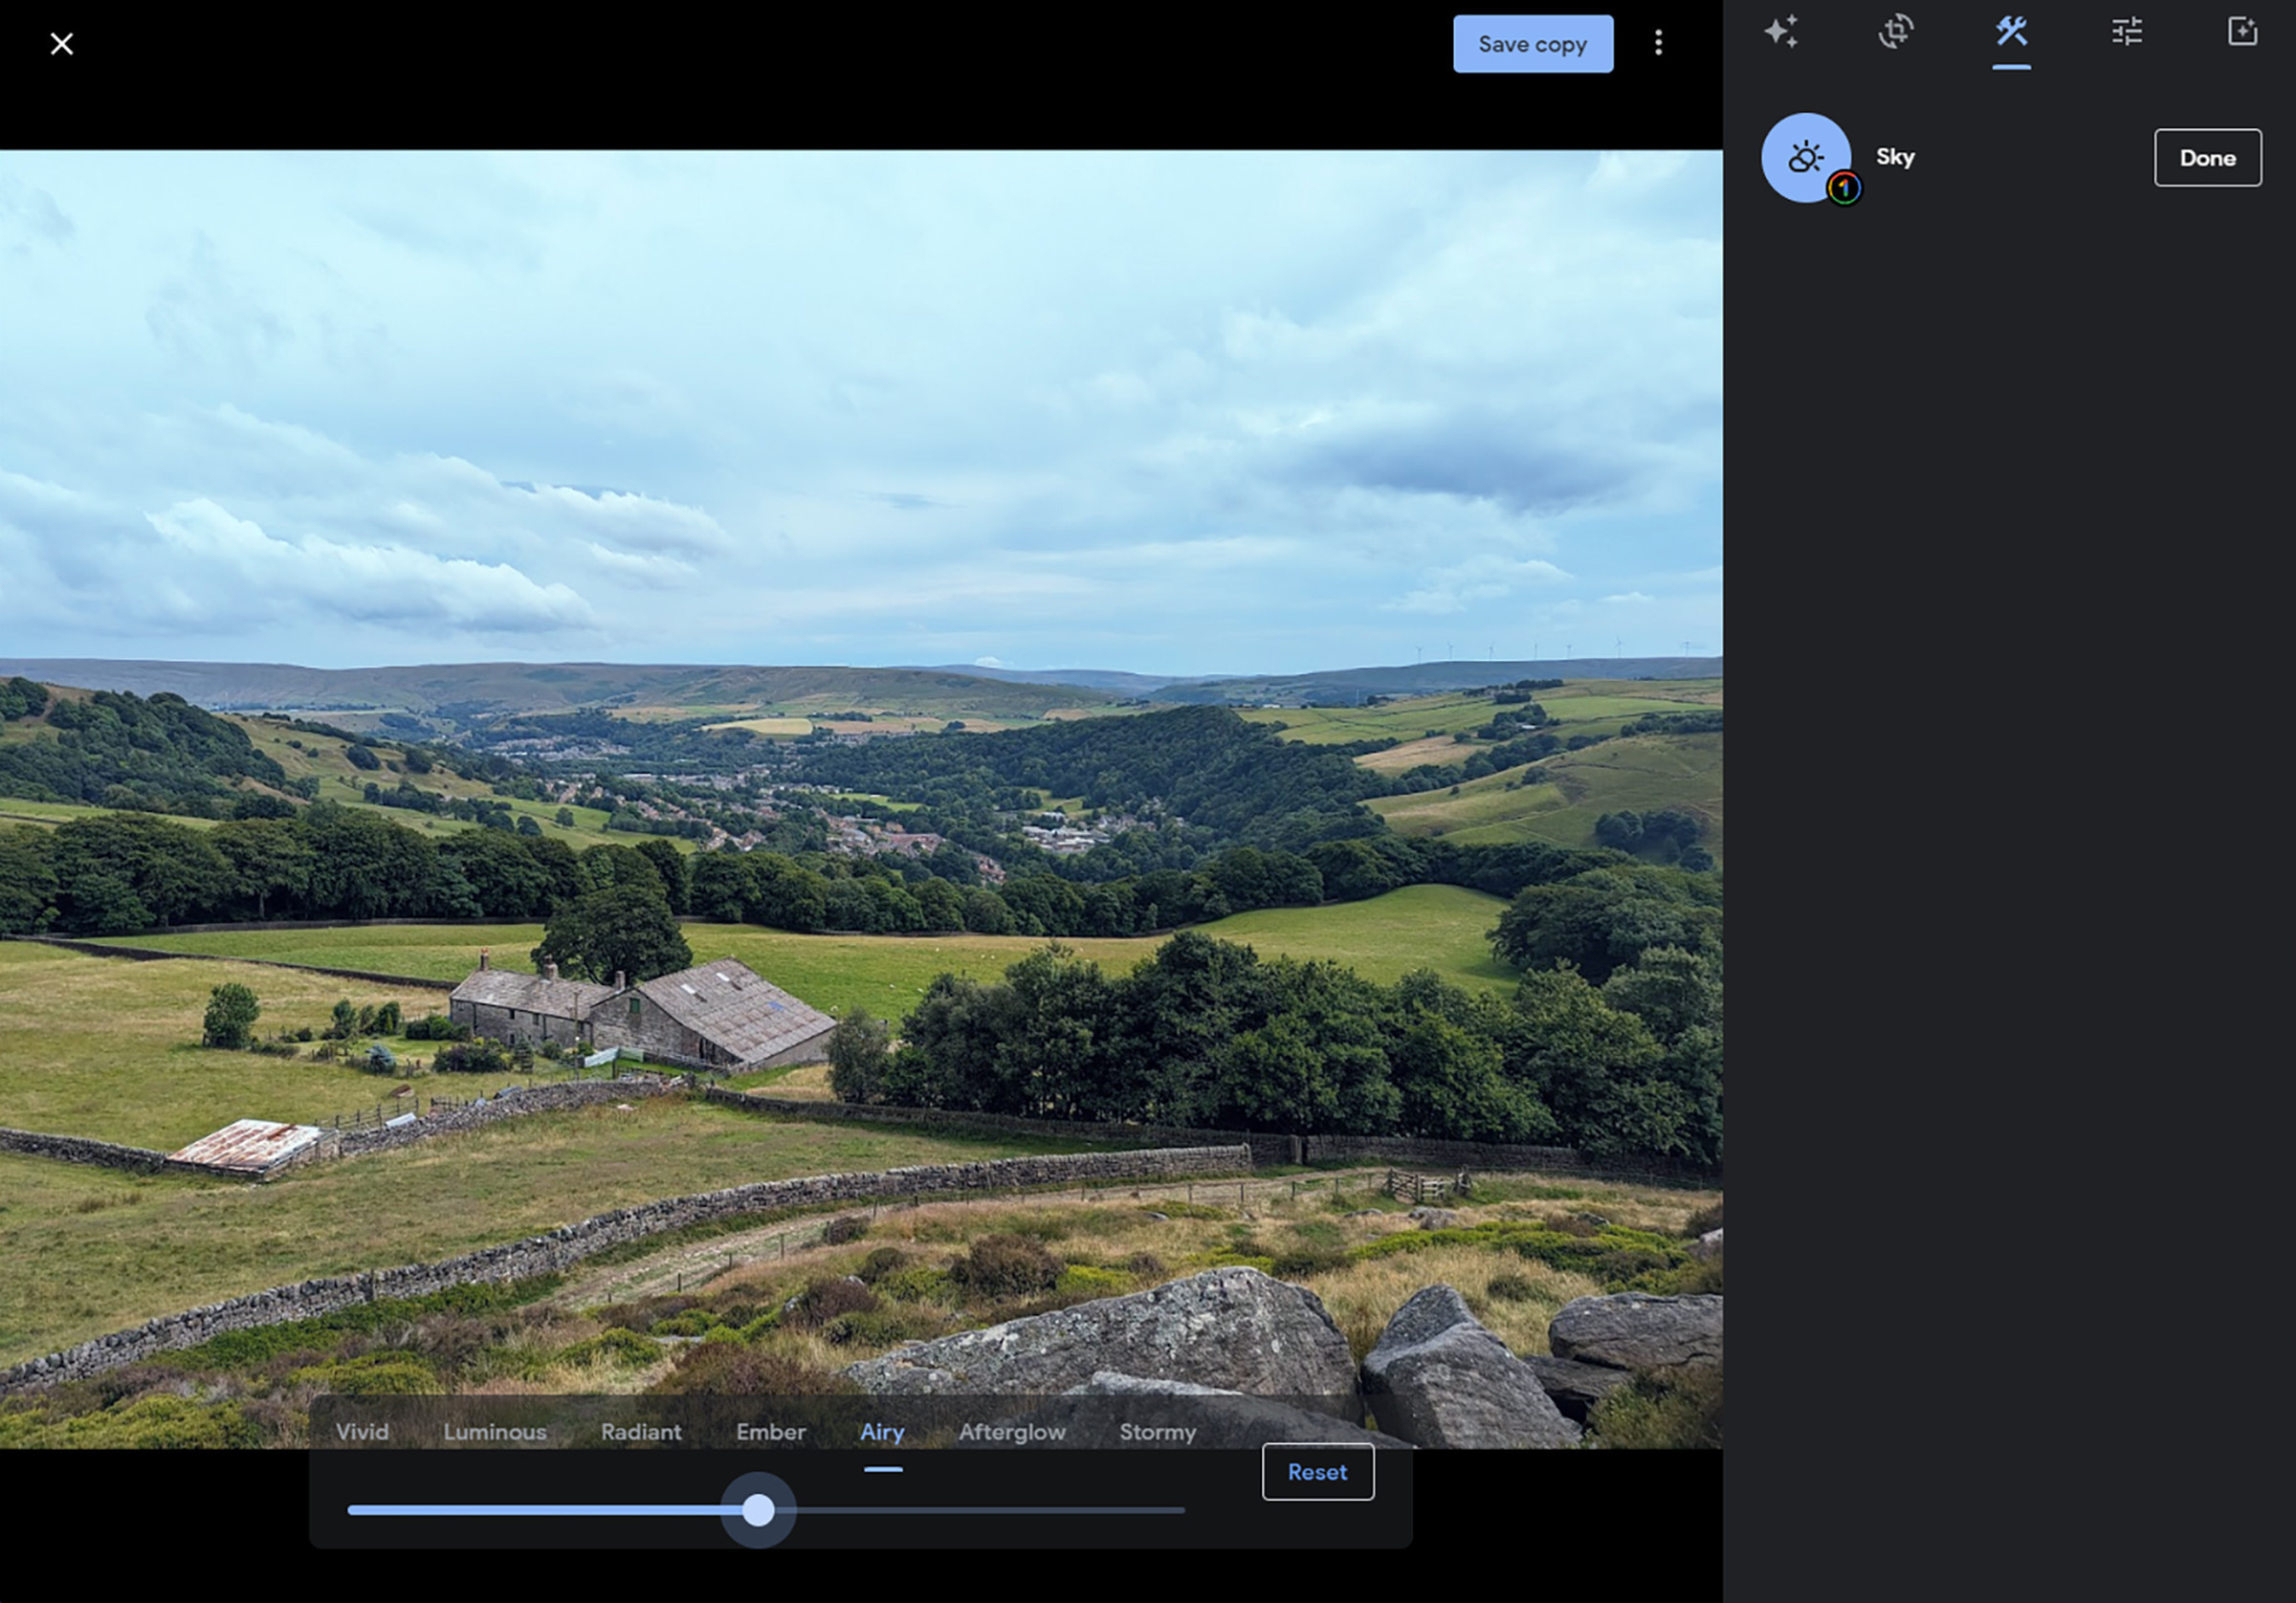
The center tab, Tools (the hammer and wrench icon), only appears if you’re a Google One subscriber and if Google Photos deems that these tools are relevant and useful for the picture that you’ve opened up. It’s new and really adds to the editing power of the Google Photos web app.
You’ll see different tools for different pictures: a portrait shot of a face may offer a tool called Portrait Light, for example, which lets you introduce an artificial light source, while a photo of a landscape may provide you with a Sky tool where you can add a “style” like Radiant or Storm.
Just click the tool you want to use. A slider under the photo will usually appear that allows you to change the strength of the effect.
Note that there may be some crossover with the Suggestions tab as well, so you could see some of the same options on both tabs.
Fourth tab: Adjust

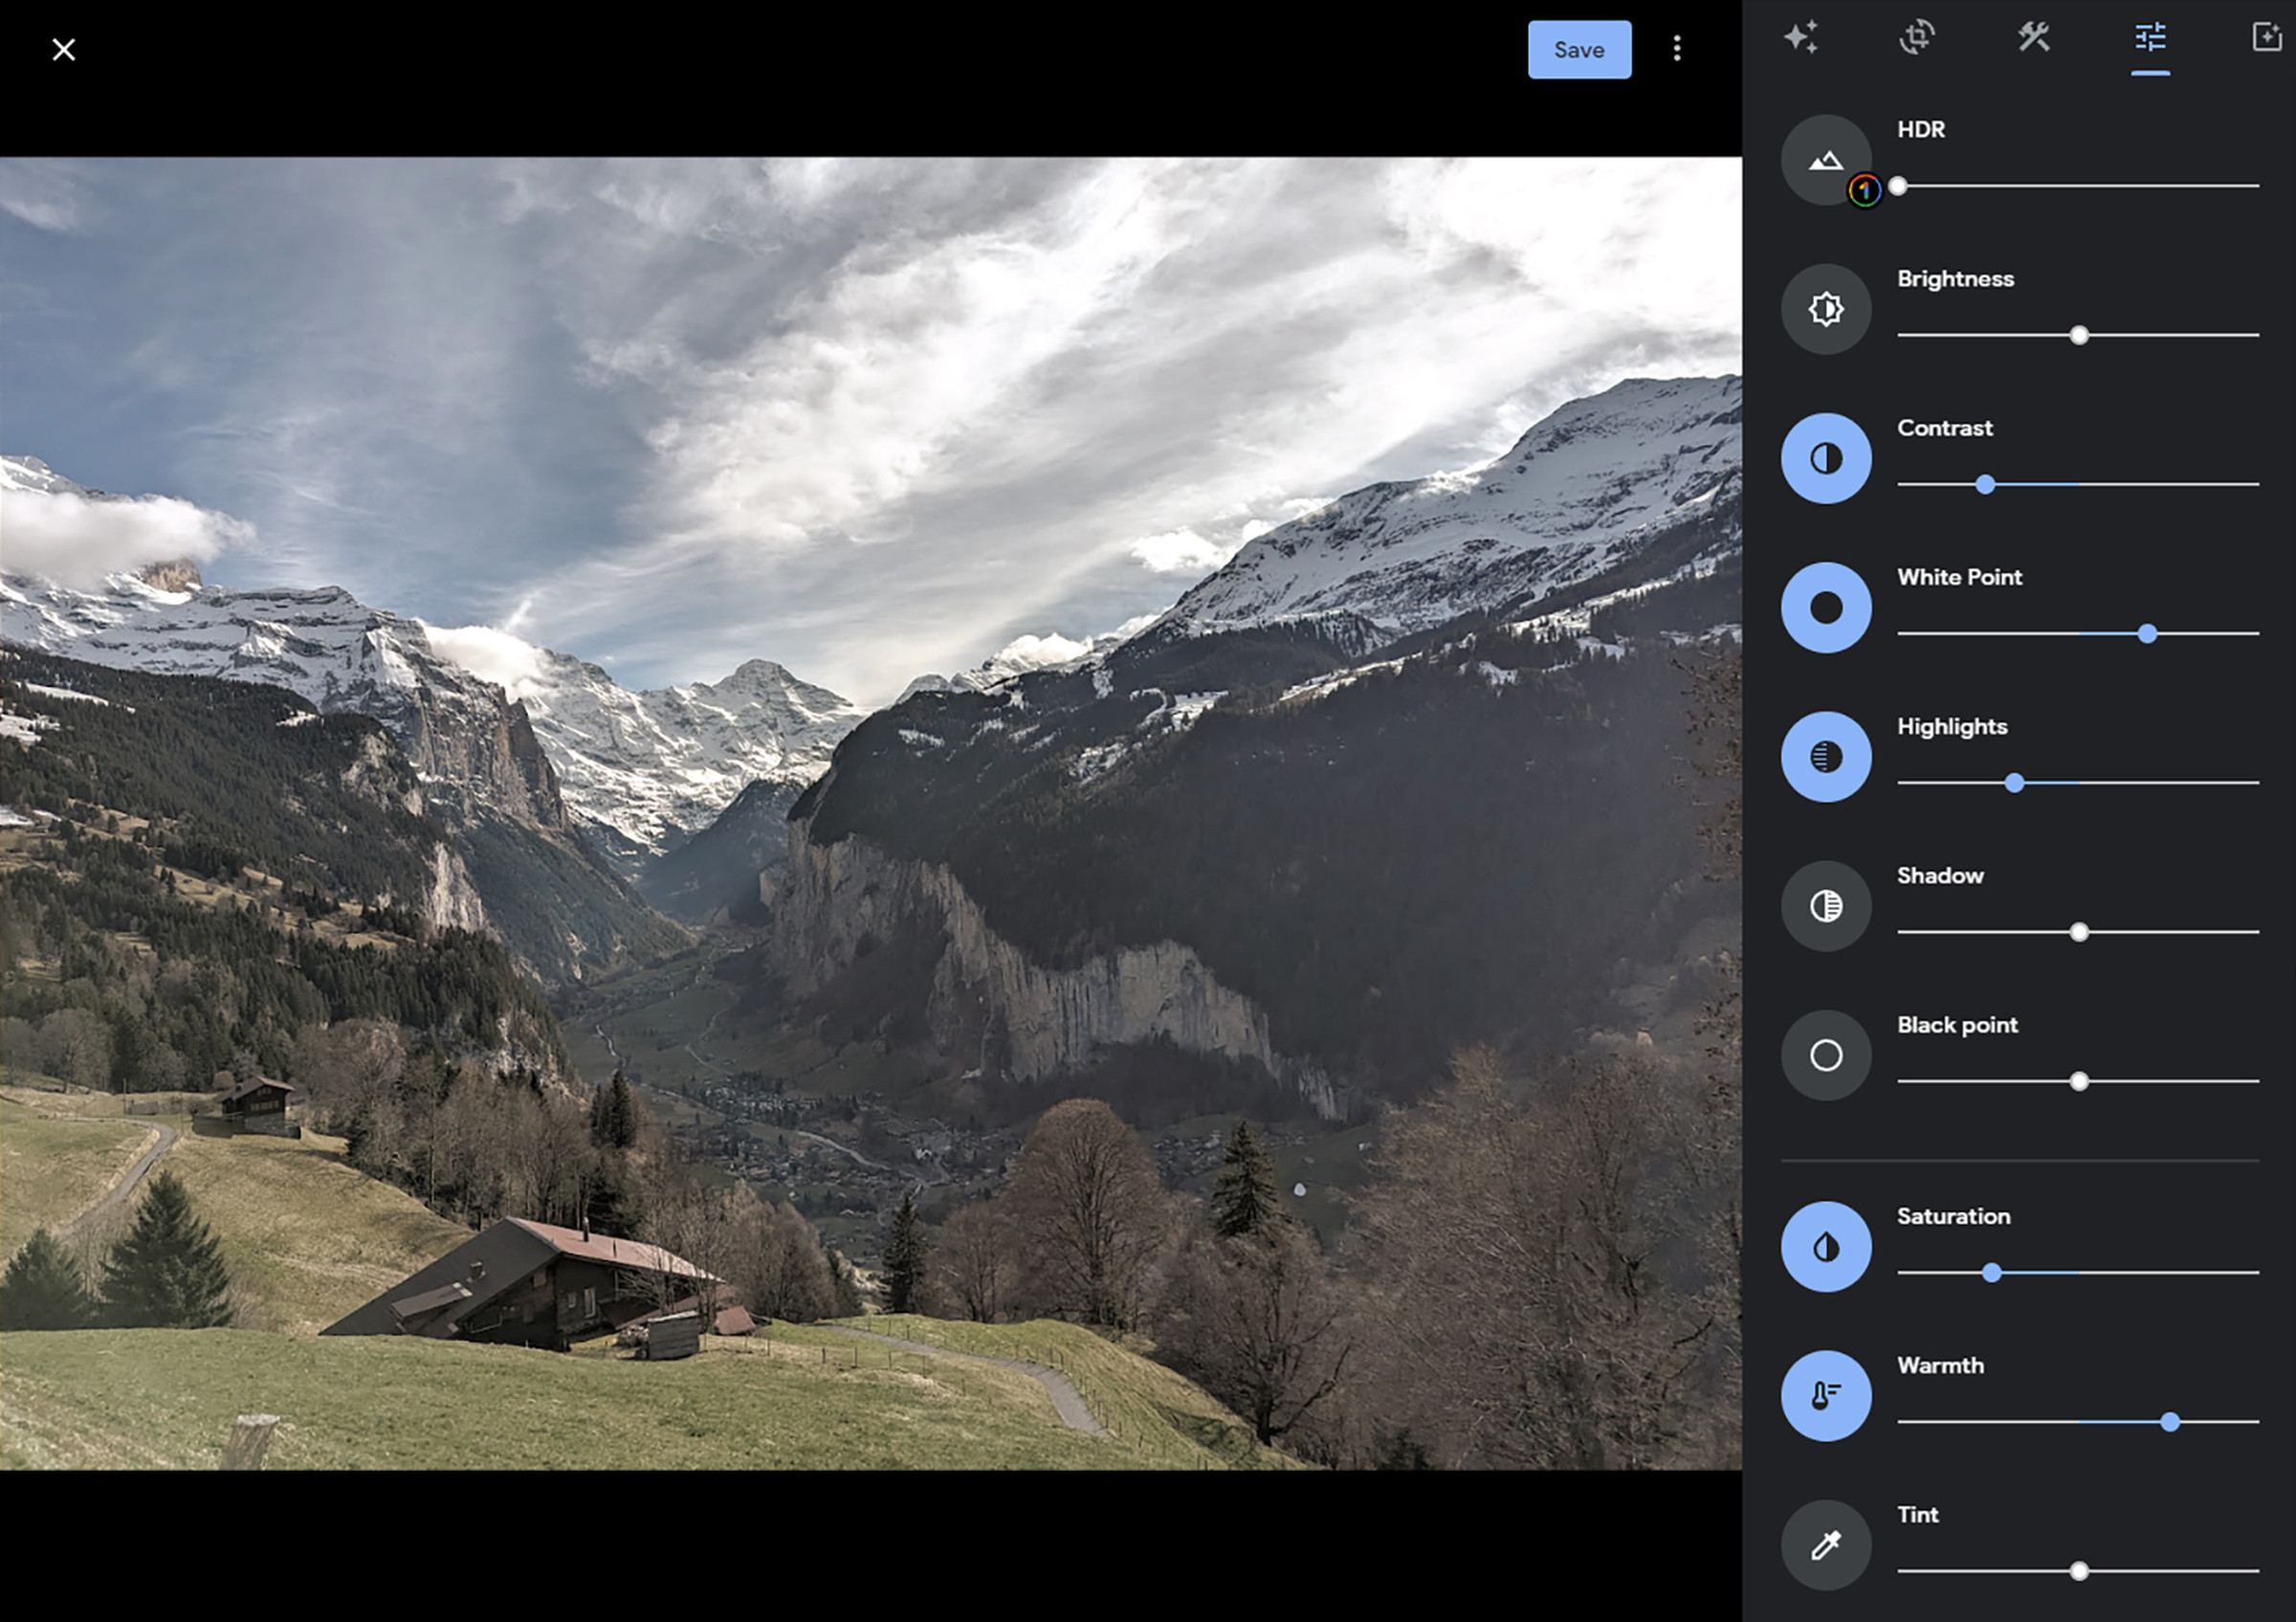
Over on the Adjust tab, you get a long series of sliders that let you change a host of different image characteristics, from its brightness to how skin tones show up.
This tab isn’t new, but it has had a bit of a redesign, and some new features have been added. They include HDR (for keeping very dark and very bright areas of a picture visible — unfortunately, it’s for Google One users only) and White point (for adjusting the white balance in the photo). Again, it adds to the range of edits you can make right in your browser.
- Click and drag on any of the sliders to make adjustments — the blue line shows where you’ve got above or below the original settings.
- Any changes you make are instantly previewed in the image to the left.
- Once an adjustment is made, the icon next to the slider turns blue. Click this icon to undo the changes and set the value back to its default.
For example, you can use Highlights to reduce the brightness of the lighter areas in the image or Shadow to brighten up the darker spots.
Fifth tab: Filters

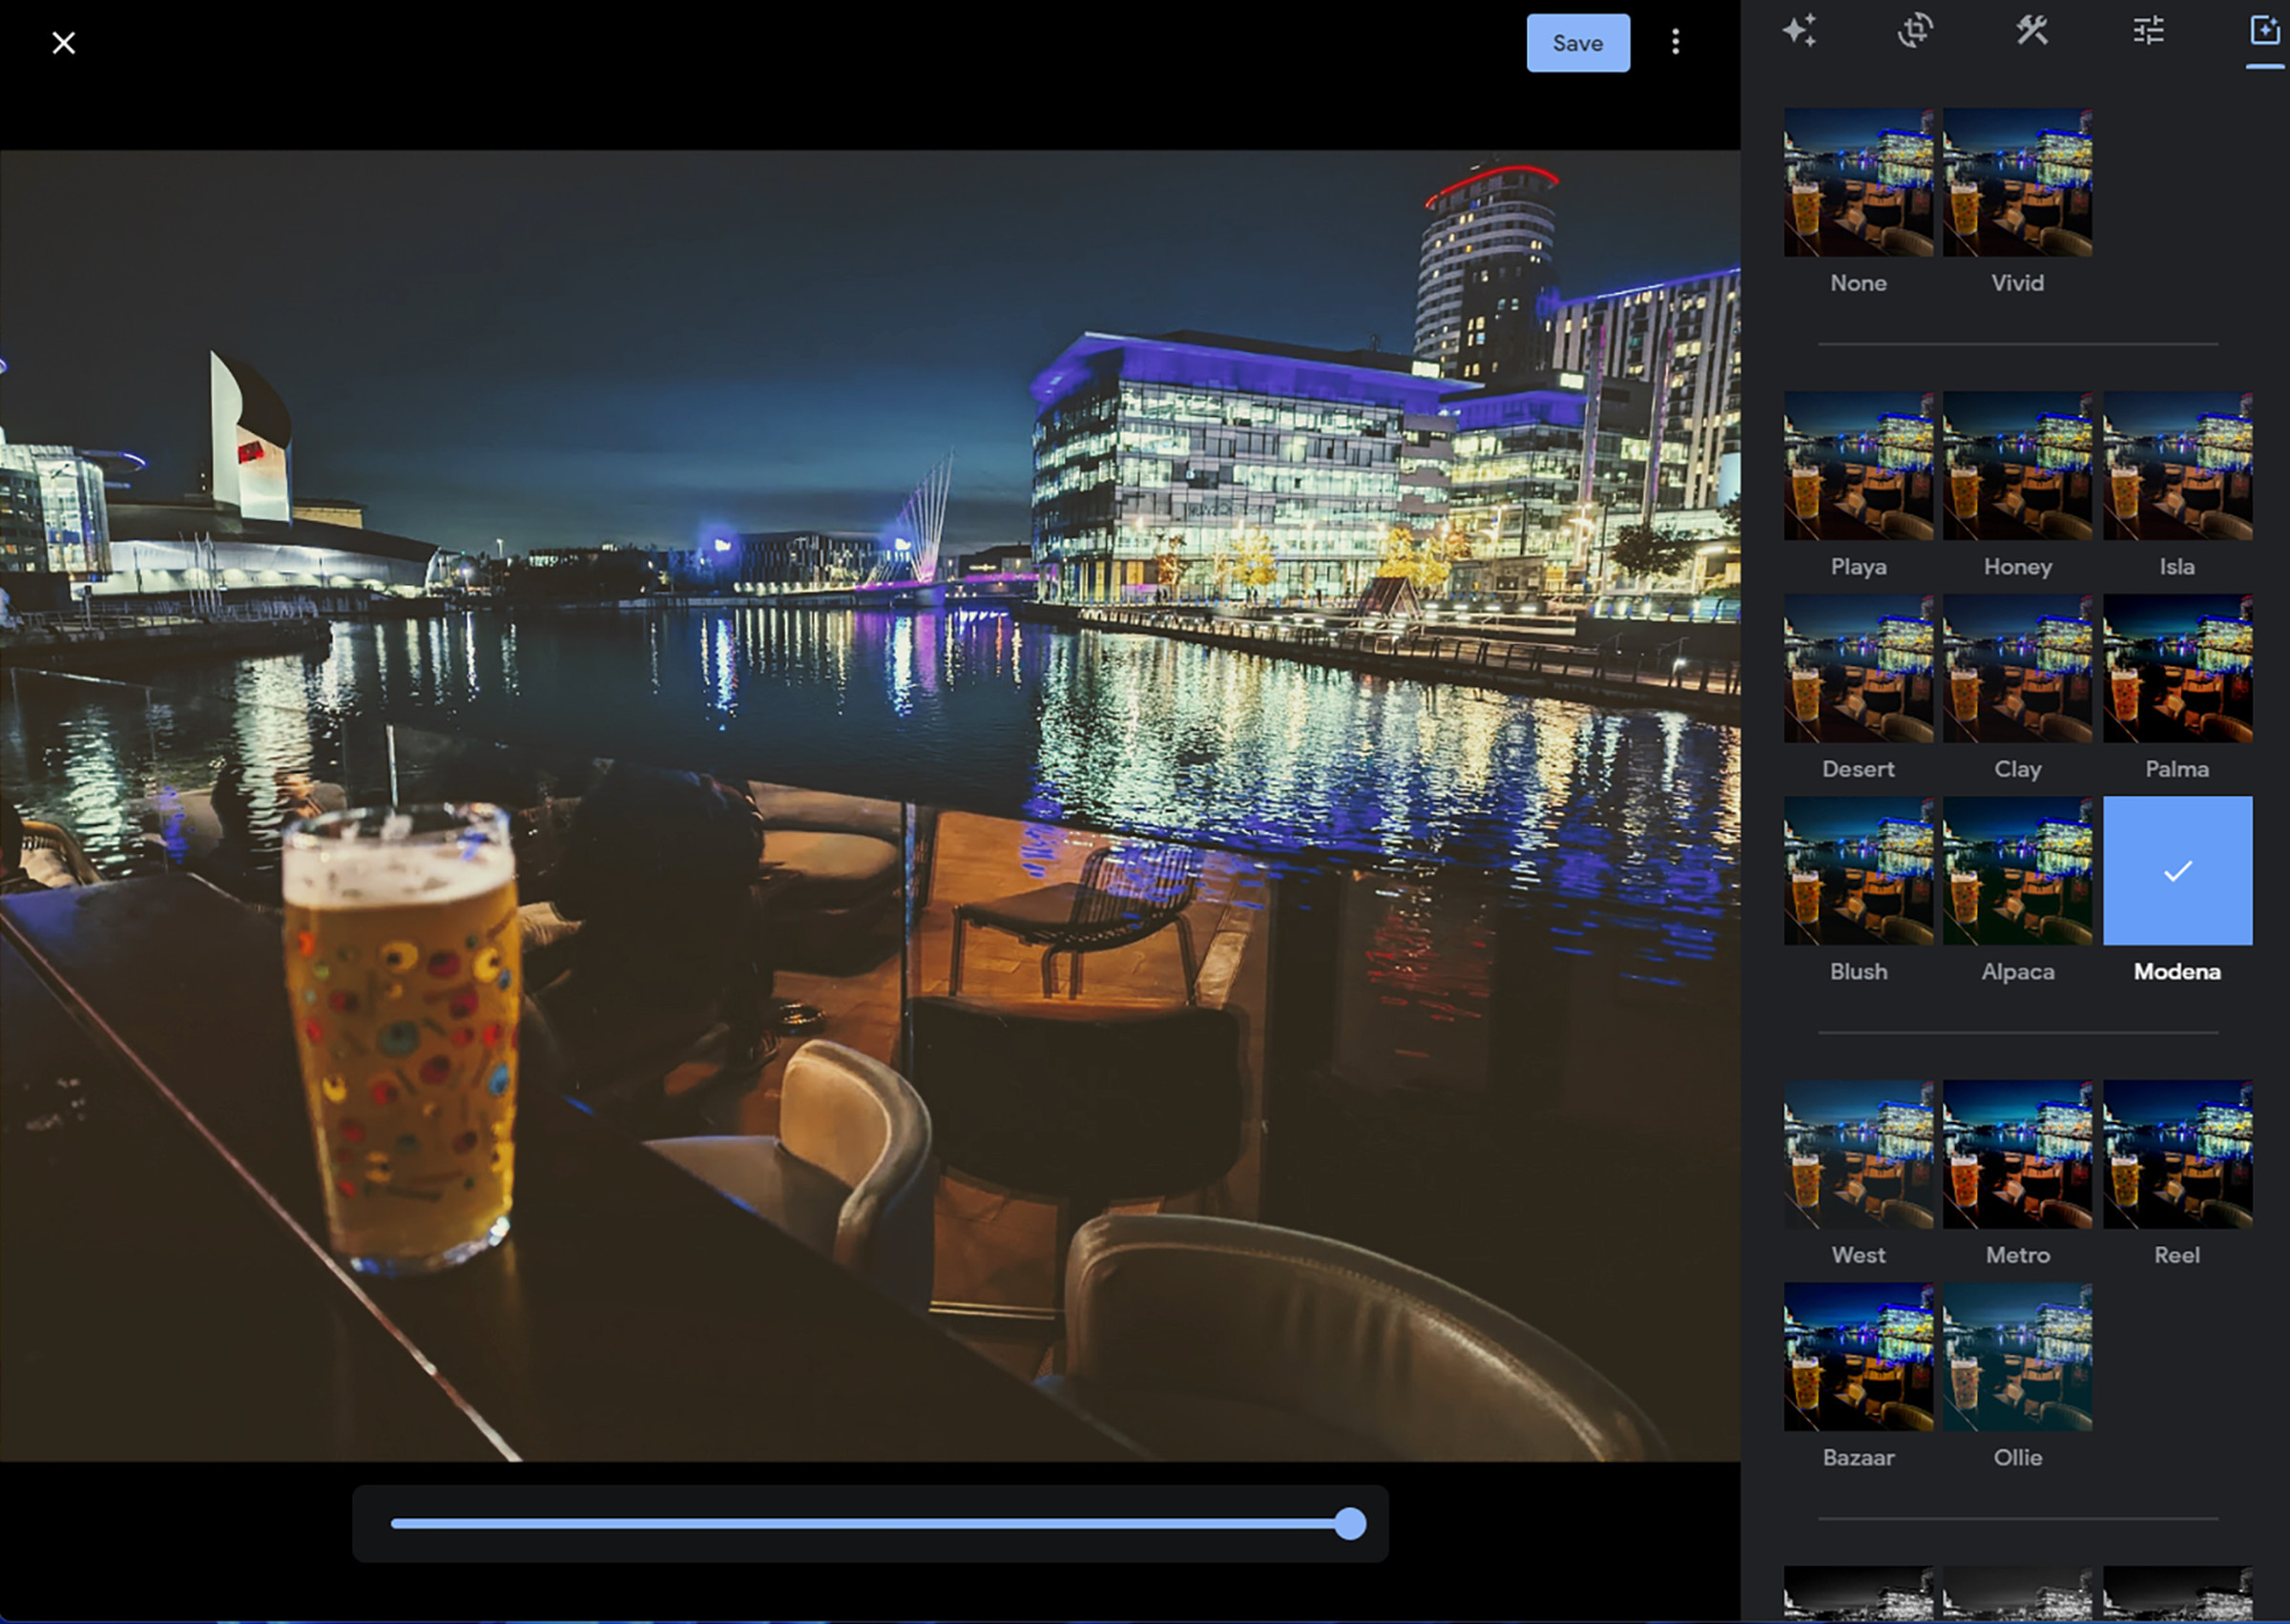
The tab on the far right is Filters (a small star inside a rectangle), and this is carried over from the old interface. These filters transform the look of your image with a single click — they’re similar to the filters you may have played around with on Instagram.
- Filters come with a thumbnail image previewing their effects. Click on any filter to see how it changes the look of the picture.
- Click and drag the slider underneath the image to change the strength of the selected filter.
- Click None to remove the filter and restore the image back to its original look.
When you’re done with all your editing, click Save (top right) to save your changes. If you want to save the updated image as a new file, leaving the original in place, click the three dots next to the Save button and then Save copy.
