Microsoft Teams has exploded in popularity since the onset of the coronavirus pandemic and subsequent remote work exodus. Hundreds of thousands of people have brought their offices home with them, and with that, they’ve turned to Microsoft Teams.
The platform has very quickly become the leader in remote teamwork in a very competitive market, having a huge bevvy of work-orientated features tailored to working from home successfully.
Now, with more and more companies allowing to let their employees work from home for as long as employees wish, it’s as good a time as any to understand how to use Microsoft Teams.
Without further ado, here are the four steps you can follow to become a Teams pro:
/* custom css */
.tdi_3_79c.td-a-rec-img{ text-align: left; }.tdi_3_79c.td-a-rec-img img{ margin: 0 auto 0 0; }
- Step 1 – Creating Teams and understanding Channels
To start your teamwork collaboration, you first need to create a team. To set up a team you input a name and a description. After this is set up, team members can be added.
Each team has subsections called Channels. Within any created team you can add multiple channels. For example, within a team – the name of your company can be used as the team name, and then for the channels, you can have “Marketing”, “Sales” or “Blog”.

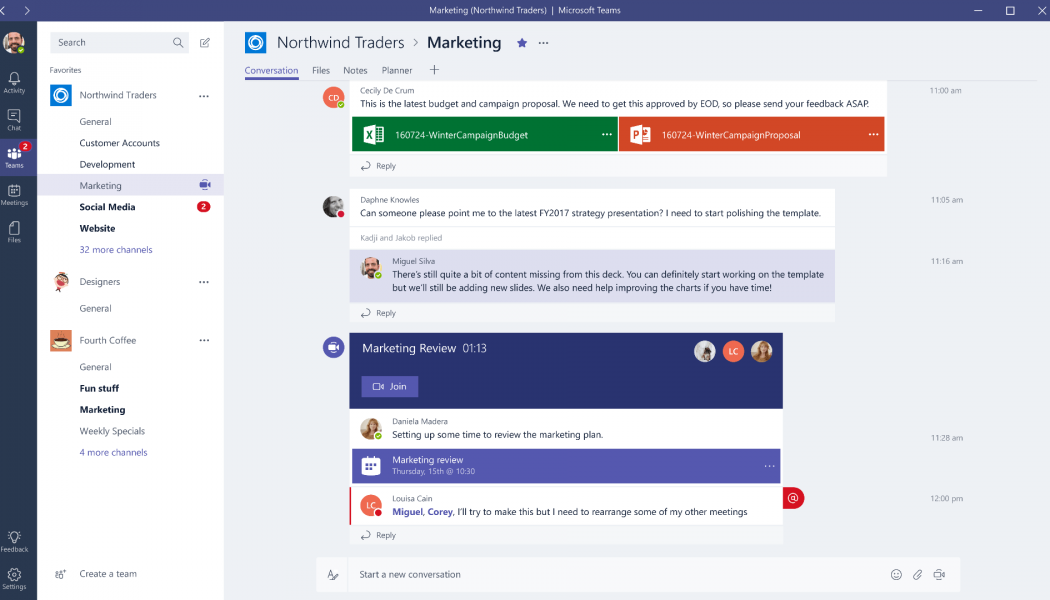
Every one of the channels come with its own set of tabs along the top. Conversation (group chat), Files (shared documents) and Notes (shared OneNote) are automatically created and you can then add your own tabs.
One of the key features of Teams is the Conversation tab. This allows each Team to have a centralised discussion that is saved and easily searchable. In Conversations is where all the concurrent teamwork is recorded. It’s basically a large group chat, like Skype, for example. In here you can share files and make video calls to anyone within the Conversations group.

The use of @mentions allows you to tag participants or even whole teams to notify others. Similar to how Discord works. You would type, for example, “@John @Jane Please can you have the report in by Friday”, then Teams will send a notification to both John and Jane and highlight their names in the chat.
Another key feature is the Files tab. Here you can perform a variety of different tasks within a window or browser. Users can delete, download, move files, open, copy, edit or get a link to share with others.

You can also start a Group chat alongside the file, to allow team discussions while all working on the files – and this conversation will appear in your Conversations thread.
- Step 2 – Taking Notes and sharing them with your Team
Clicking on the Notes tab takes a user straight to your Team’s shared OneNote drive. Within Teams, users can view and edit the notes within OneNote from the Team’s window. Users can also access the Team’s notes through the OneNote app.

Here you can leave notes for your entire team to see. For example, the marketing lead can leave a series of marketing notes for the Marketing channel. Only those within the marketing channel will be able to see and access these notes.
- Step 3 – Adding your own Tabs
With three pre-set tabs, users can also create and add their own tabs. For example, a tab for a planner, a tab for Excel spreadsheets, Word documents, specific dashboards, and maybe even a tab to share memes or family pictures. Just click on the + icon next to the Notes tab to get started.
Now, Teams has support for many Microsoft products, like those mentioned above, as well as many other future integrations still being worked on. Like integration with Asana, for example. Team users should expect many more integrations incoming as Microsoft attempts to make the lives of users as easy as possible as thousands flock to its teamwork platform.

- Step 4 – Understanding the Menu and all of its features
Along the left-hand side of the Teams window, users can navigate the many different features within the platform. Features including Chats, Meetings, Files and Activity.
Activity shows the latest movements and uses – the activities – of the members of the team you are part of.
Chat is the receptacle for all of your team’s Skype for Business conversations, including a complete chat history. Note that this chat bar is for chats outside the actual Teams platforms. To use the chat in Teams and channels, users should use the Conversations tab.
The Meetings tab pulls your meetings in from your Outlook account. It also allows you to schedule meetings, where the Meetings tab sends notifications to the members of your team when a meeting is due. Gadgets Africa reminds us that Teams is for collaboration, not for calendar management.
Within Files, you can view a database of documents across Microsoft’s clouds services in OneNote, OneDrive and Teams itself. There is also a helpful ‘Recent’ tab so users can quickly access the latest documents you were working on.
Edited by Luis Monzon
Follow Luis Monzon on Twitter
Follow IT News Africa on Twitter


